

此篇是 [ Apple Mac Mail 設定 iPage IMAP & SMTP 收發信 ]
跟我一樣實在是很不喜歡 iPage 的 Roundcube Webmail 介面,每次看信都要先登入iPage帳號才可以收發信覺得麻煩的朋友,您好~
在網路上爬文找到了iPage垃垃長的頁面而且還有兩種版本,試了很久根本不是像網頁上寫的 ==
其實很簡單,我們趕快來設定吧!
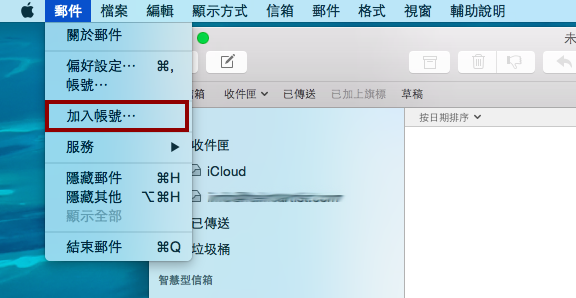
首先,請打開郵件軟體,然後找到 郵件 – 加入帳號
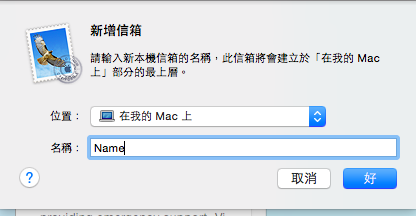
之後在位置可以選 要將檔案放置在哪邊?iCloud或是Mac….都可以
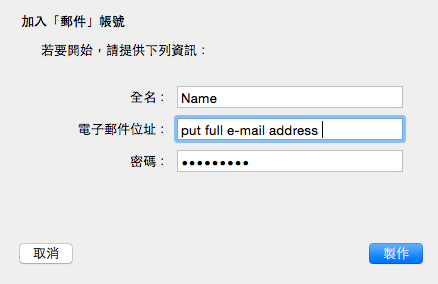
名稱打上自己想要的 (之後會出現在信件夾中)
Your Name: The name to display on your email.
再次輸入名稱
第二個欄位一定要輸入完整的e-mail
地三個欄位是 e-mail登入的密碼
Email Address: Your full email address.
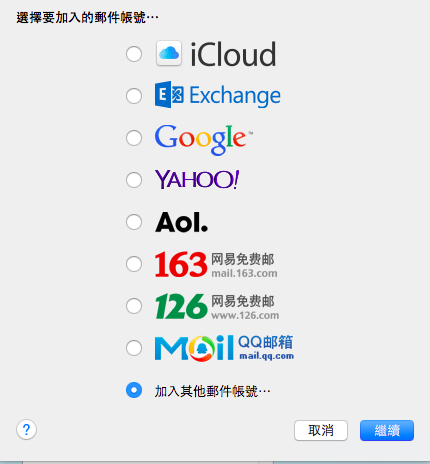
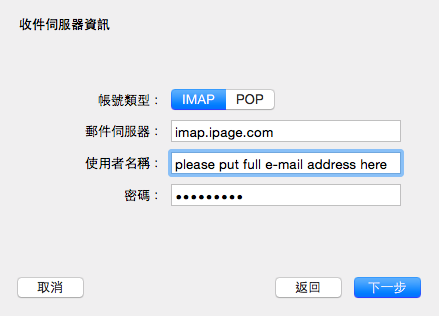
選擇IMAP | 郵件伺服器:imap.ipage.com
Account Type: IMAP | Incoming mail server: imap.ipage.com.
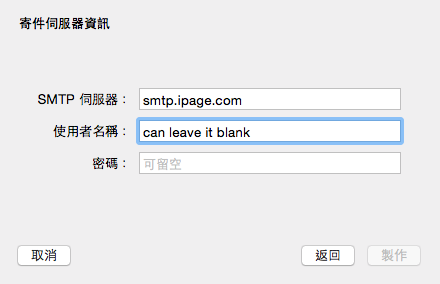
SMTP伺服器:smtp.ipage.com
使用者名稱等可以留空白
Outgoing mail server (SMTP): smtp.ipage.com
Name and Code can leave it blank
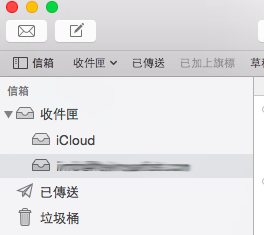
收件匣就會出現剛剛設定好的郵箱資料夾 之後是看看同步 是不是能把原本的信件抓過來
就設定完成了!
After this step, the mailbox will show up your setting. Then try to retrieve your original e-mails to see if it is successfully good to go.
Hope this article helps you or save some time for you.
